On this page we try to give you answers to your questions about indoor cycling and our software.
We have created a small quick start guide (PDF) for you to get started: https://ictrainer.de/wp-content/uploads/2022/03/Quickstart-Guide_en.pdf
We have deliberately decided that you have to download all the files required for the workout before you start your session and can only start it after that.
Of course, you can choose between a pure workout with just a few kilobytes of data and video rides with music lasting several hours with up to one gigabyte of data.
The download only takes place the first time you use it and is available to you again and again afterwards – even if you train completely offline in the garden, garage or basement.
The reason for this is that nothing is worse for us than your training being disrupted by technical problems in the middle of it.
After all, we don’t have your internet connection in our hands (and sometimes several people use it at the same time).
In addition, your hardware requirements are lower and you can, for example, do your workout on a 10-year-old Windows tablet without any problems and stream Netflix&Co at the same time.
Of course, a reliable worldwide server structure would also incur considerable costs, which would have a negative impact on the price of icTrainer.
Pro tip: You can also download all videos at once with the code “video” (music code “music”) so that you only have to download the units themselves later (which are super small).
For Windows and MacOS, you also have the chance to easily transfer this data to a USB stick.
You also have the chance to do all workouts as a pure workout without music and video, which you can also download and start super quickly
All smartphones, tablets or desktop computers support BluetoothLE out of the box. So you don’t need an exra ANT+ stick for the connection.
You can also send all your training data via ANT+ to your normal fitness tracker (bike computer, fitness watch, etc.) and transfer it to the app of your choice, and we communicate with the bike trainers in parallel via BluetoothLE. We don’t force you into another cosmos.
For Windows and MacOS, you can also connect with an ANT+ heart rate belt or your fitness watch with ANT+, provided you have an ANT+ USB stick installed on your Windows/Mac computer.
If there are problems with ANT+ under Windows 11, there is a good tip here.
Unfortunately, there are many reasons for this:
Several devices are connected to your roller trainer via Bluetooth
If other devices (e.g. watch, speedometer, etc.) are connected to the roller trainer at the same time, Bluetooth sometimes has problems with the assignment. It is best to simply switch them off for testing.
Your roller trainer or computer does not support Bluetooth
You can usually retrofit your computer very easily and cheaply with a small Bluetooth USB dongel (e.g. https://www. amazon.de/Asus-USB-BT500-Bluetooth-Stick-BLE-Technologie/dp/B08B9WQFTL/ref=sr_1_4)
Your computer supports Bluetooth, but not BluetoothLE
1. Open the device manager (press the “Windows key + R” to open the “Run” window). 2.
2. then type “devmgmt.msc” into the text field and confirm with “OK”)
3. open the “Bluetooth” tab.
4. right-click on the Bluetooth transmitter (often “Generic Bluetooth Radio” or “Intel(R) Wireless Bluetooth(R)”).
open properties.
5. switch to the “Advanced” tab.
6. here you will find an LMP number
We need at least LMP6, which corresponds to Bluetooth 4.0…
If all this doesn’t help, you are welcome to send us your logfile (click on HELP/? in the navigation on the left and then on Send LOGFILES on the right)….
Please check whether you have connected another power control via ANT+ actively (ie switched on) to your roller trainer (e.g. via bike computer or smartphone). In this case, the roller trainer unfortunately doesn’t know where to get the ERG mode from. Another device (e.g. bike computer) may only be connected in parallel via ANT+ for performance measurement . With Garmin bike computers, for example, it may be displayed in parallel under the sensor type powerbut not as sensor type Indoor Trainer or for the sensor type Indoor Trainer the bike computer must remain switched off during training with icTrainer.
Some roller trainers unfortunately cannot reduce resistance enough at low wattage settings and high cadence depending on the selected gear ratio. Sometimes it helps to choose the easiest gear on the bike.
Example: https://support.garmin.com/de-AT/?faq=4PAzxvbvOL6AliMxKaShQ9
Of course!
In the “Real routes / GPX” the ERG mode is deactivated by default and you determine the resistance via your gear shift – just like in real life.
With predefined “Structured Workouts” you can deactivate the ERG mode via a small switch (=SIM mode).

If you want to “Create New Workoust”, you can specify there in each interval whether you want to base the resistance on your FTP, i.e. ERG mode, or on a slope, i.e. SIM mode.
First of all, you should select your training platform in the USER PROFILE of our software. It is important for some platforms that you use the same email address in our software and in the training platform.
After you have uploaded a workout to a training platform for the first time (and in this context have logged in there once), all subsequent workouts-of-the-day will be displayed directly on the icTrainer start page – example:
After finishing your workout, we will ask you if you want to SAVE the RESULT and if you want the data to be uploaded to your preferred training platform.
For most training platforms we offer an automatic upload. You can also watch our explanatory videos on YouTube.
Special feature: Unfortunately, Garmin Connect currently only offers a semi-automatic upload. For this you can proceed as follows: After your first workout, we will create a connection with your default browser to Garmin Connect (if you allow cookies in your browser, the login will be automatic in the future and you will land directly at the right place – otherwise you have to log in to Garmin Connect manually each time) and you can upload the workout file manually. By the way, the download directory can be set individually under SETUP. Please also have a look at our corresponding explanatory video about Garmin.
Of course you can also open old workouts and upload them manually to Garmin Connect. Just click the corresponding button on the training results page and download the .tcx file or upload it to Garmin:![]()
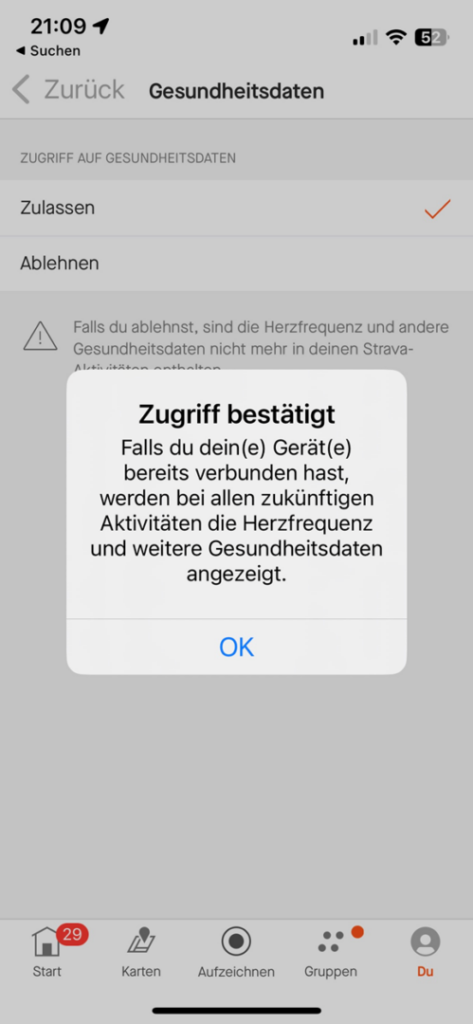
You must allow “access to health data” on Strava in your profile.

We would like to enable as many athletes as possible to use icTrainer.
To make this possible with MacOS 10.x, there are unfortunately two apps for technical reasons.
All detailed information about the two apps (and how you can switch between them without any problems) can be found on our special page.
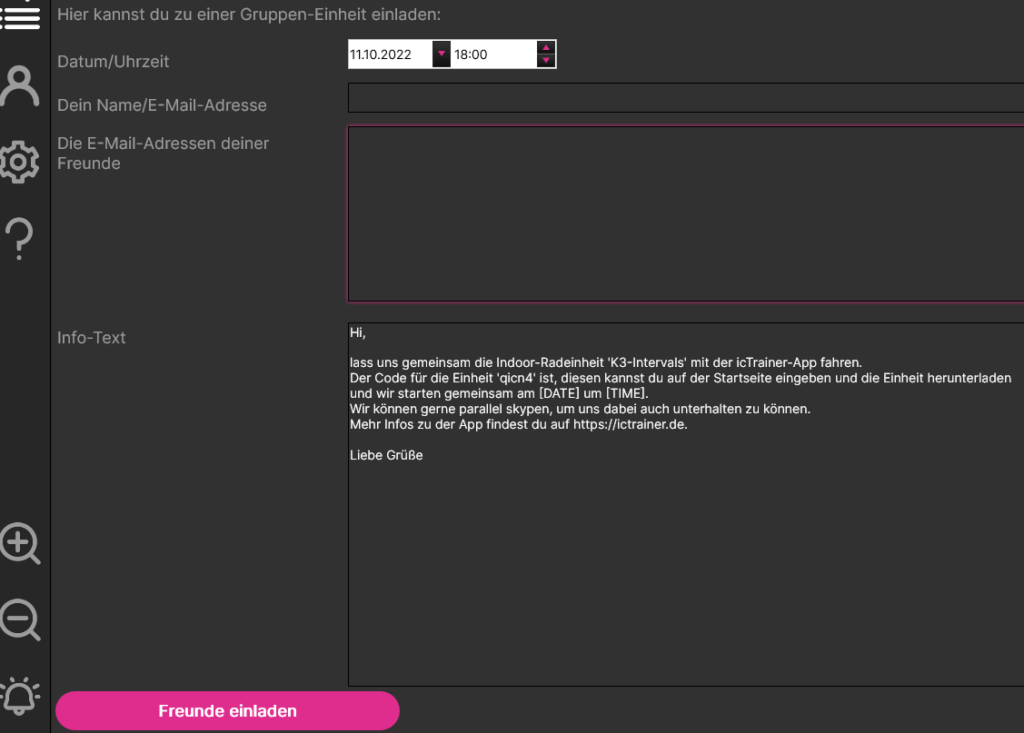
As a club, coach or friends, you can also do joint workouts.
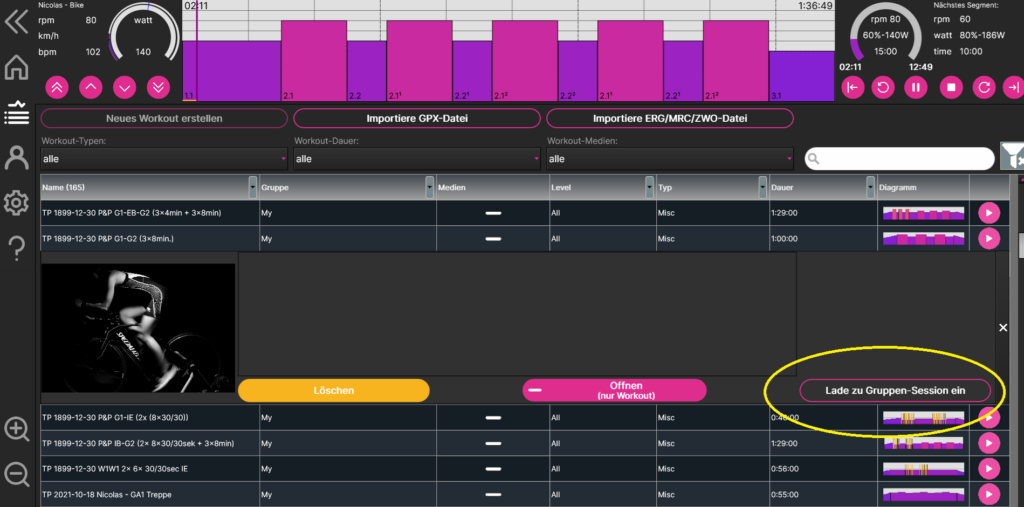
For this purpose, a responsible person downloads the corresponding workout in icTrainer in advance and can then invite to a “GROUP SESSION” in the workout list.


There are even several ways to combine an external powermeter + roller trainer + icTrainer. The three most common are as follows:
1. exactly for such cases there is the powermatch function in most roller trainer apps (goal: an external powermeter transmits the watt measurement via ANT+ to the roller trainer and this then to icTrainer). Such a hardware-side power match is often faster than a software-side power match in a software.
Example Wahoo:https://www.smartbiketrainers.com/how-to-enable-the-wahoo-kickr-snap-powermatch-feature-and-why-you-should-do-it-5726
2. you can also add your external power meter in icTrainer under settings as POWER for power measurement and then use the roller trainer only as TRAINER for power control.
2. experts simply create two users in icTrainer (one with roller trainer and one with powermeter) and can then measure both values in parallel. Often it turns out that the two devices do not measure so differently. Which device you trust more, you can then decide…
A very important point for us is that you can also use all other icTrainer functions during training. For example, it is also possible to adjust, rewind, add music and much more to an ongoing training session in the editor. This is the same as outside, where you can also decide at short notice to lengthen or shorten the unit or to ride one more climb (and thus one more load interval). However, this is only possible with an interface (UI-UserInterface), which may initially appear a bit overloaded. But you quickly get used to it and soon appreciate this “feature”.
Pssssst….. The software was originally called Indoor-Cycling-Trainer.
Even though we now allow you to use many more devices 😉
Once purchased = can be used on all end devices – even across operating systems 😉
Procedure:
You first buy our low-cost license in the app store of your main device.
Then go to the license purchase dialog on the second end device and enter the same email address as on the main device and click on the RESTORE LICENSE button.
The software will then notice that there is already a license for the e-mail address on another device and you will have to enter a four-digit security code, which we will send to your e-mail address at the same time.
Depending on which device or which software you use to look at the same route, the altitude readings are very different? There is a mathematical reason for this. Of course, the barometer on one device can be more accurate than on another device. But this doesn’t really matter that much. Neither is the reason whether the device is currently calibrated or not. The altitude meters are counted relatively, without calibration “only” the initial altitude and the final altitude are wrong. What is more important is when does a vertical meter count!
If a route is only uphill, i.e. each measuring point is higher than the previous measuring point, it is very easy. The altitude meters are the highest minus the lowest measuring point. But what if a route is wavy and a measuring point is a few centimeters below and sometimes above the last measuring point? Depending on the device/software, there is a limit as to when an altitude meter counts at all. This is often, but not always, around 3 meters. In other words, if you ride 2.99m “uphill” and then 2.99m “downhill”, this is not counted as an altitude meter, but as a flat route with 0 meters in altitude, the same applies to 10cm uphill, 10cm downhill, 10cm uphill, 10cm downhill. .. This is often the logic behind the procedures where Strava and GarminConnect “recalculate” the altitude meters and arrive at the values that we know.
And this is exactly the reason why the values are very close together on real climbs, but far apart on undulating or flat routes. On a relatively flat stretch, the difference between the centimeter-precise addition of the altitude meters and the smoothing is in the factor 3 range, and the better the barometer, the smaller the difference.
Here are a few comparisons based on a Challenge Roth course ridden with a Garmin bike computer (first lap plus descent, i.e. 93.6 km, the second lap is only just under 85 km long), which illustrate this very well:
The resulting GPX file has 11,236 individual points. If you count the meters in altitude to the nearest centimetre, you get 1,397 meters in altitude (a). If you calculate out all changes in altitude less than 3m, you get 701hm (b).
The original route comes to 803hm with GarminConnect with altitude correction (c) and without altimeter correction (ie barometric) to f=709hm (d). We see that thus (b) and (d) only 8 meters apart. This should be considered a realistic value.
icTrainer smooths the route in GPX mode with an average of 15 seconds each, so you still get 751 points with 804hm to the centimeter (e) and again all changes in altitude less than 3m calculated 699hm (d). Thus the value corresponds to (d) from icTrainer again almost exactly the above values (b) and (d).
If you now upload the route traveled in icTrainer to GarminConnect, you get 901hm there with altitude correction (g) and without altitude correction to 702hm (H). Again, we see the value (h) is very close to (d), (b) and (d).
You can see the wide range of results here. Incidentally, Challenge Roth specifies 1,200 meters in altitude for the entire route, which would mean 625 meters in altitude on the first lap plus descent and 575 meters in altitude for the second lap. This figure is therefore significantly lower.
Similar information can also be found in the following article on the same topic.
With regard to speed, we calculate this based on the watts you have pedaled, your weight, height, type of sport, etc.
We use the following formula for this: http://www.kreuzotter.de/deutsch/speed.htm
This is significantly more accurate than a speed sensor, for example, which does not know this data.
It is important that the data is entered correctly on the device you are using and that the appropriate user profile is also activated.
This is necessary so that BluetoothLE can be activated: Two permissions must be granted here: ACCESS_FINE_LOCATION / ACCESS_COARSE_LOCATION. We do not access your location information anywhere on the device.
Some virus scanners always first identify executable files (.exe) as suspicious and then subject the file to a separate check. This only happens to the first user who calls the file and only once. When this is done (usually after 90 minutes), you can then start the file normally without the warning.
We try to solve this problem beforehand by submitting the file to the virus scanner manufacturers so that the file can be checked. However, we are dependent on your help, i.e. if you have a virus scanner that reports icTrainer as suspicious, please let us know and tell us which virus scanner you are using and we will contact the manufacturer so that this can be checked there in future before we deliver a new version.
The App Store versions of icTrainer do not have this problem, of course, as they are intensively checked in advance by the App Store providers.
You can use the following free additional app to send the heart rate of your Apple Watch to icTrainer via Bluetooth:
https://apps.apple.com/de/app/heartcast-heart-rate-monitor/id1499771124
Depending on the operating system, not all video streaming providers are currently supported.
We are working on enabling better compatibility.
| Windows | MacOS | iOS | Android | FireOS | |
| YouTube | Works | Works | Works | Works | Works |
| Netflix | Works | Works | Works | – | – |
| AmazonPrime | Works | – | – | Works | – |
| Spotify | Works | – | – | Works | Works |
| Disney+ | Works | – | – | – | – |
First you would have to define your MyMedia directory in SETUP:

If you then create a “New Workout”, you can switch between the “Sequence Mode” and the “Music Mode” at the bottom left and see your own music tracks and assign them to the workout by double-clicking.

Of course, one of our goals is to offer many training programs with motivating music. The problem with this is that it either causes costs which we would have to recirculate or we need enough royalty-free music.
If you are willing to have your own music or music of your band integrated into the training programs as GEMA-free with Creative Commons License 3-0/4.0 (CC3.0/CC 4.0) or a Professional License, you will receive our eternal gratitude as well as the corresponding attribution in the training programs.
With a Professional license, the use of the music is restricted to the icTrainer project, i.e. neither we nor anyone else may use the music outside of icTrainer, whereas with the Creative Commons license there is no such restriction. You only have to tell us which license you want to choose when you pass on the music.
You can send us the music via the contact form or at least initiate contact and we will clarify the details in advance. It is important that you really own the rights to the music, otherwise you will bring us into the devil’s kitchen.
We would be delighted if you shared GPX videos of competition routes, famous climbs or great laps with us and made the videos you recorded available for everyone to download. At this point, the mp4 and the matching fit/gpx file are sufficient for us. Just write an email and we will clarify how we can exchange the data.
Additional Information
You can find more background knowledge in our extensive video tutorials

